
Introduction
Hi folks ![]() , in this post we’re going to keep going through the Linux from scratch guide,
looking into cross compilation and getting started building the system.
, in this post we’re going to keep going through the Linux from scratch guide,
looking into cross compilation and getting started building the system.
This post will cover the rest of the guide - from installing the tools to booting the system.
Cross compilation
What is cross compilation?
Cross compilation is when a machine is used to build a compiler and the required toolchain for a machine that is usually different to the one used for the build. In this case, we are using the same machine, but the overall goal is similar. Effectively we are trying to create a temporary area that has all of the tools we need that are isolated from the host system (the system we are using the build the OS), and as a result, aren’t dependent. [1]
How does it change what we need to do?
Instead of installing the tools directly on the machine and using those, we will need to use the chroot command, which will help us to isolate the build from the host system, as chroot will let us run a shell that can’t access the host system outside of the starting directory.
Building the toolchain
High level instructions
Please note as the guide suggests, it’s really important to check that your $LFS environment variable is set properly. You can do this by running
echo $LFS
Which should output /mnt/lfs
It’s also recommended to re-run the host system requirements script, which I’ve created a copy of here [2].
At a high level, the build process only involves a few steps:
- Move all of the sources and patches into a directory we can access from the
chrootenvironment, e.g./mnt/lfs/sources/ - Change to the source directory
- Ensure you are logged in as the
lfsuser which we created here. - Use tar to extract the package
- Change to the extracted package directory
- Follow the build instructions
- Change back to the sources directory when complete
- Delete the extracted source package unless stated otherwise
For compiling the toolchain, we install them under the $LFS/tools directory as we will use this to separate those we
actually install for the system. This will also allow us to remove the temporary tools later on.
Issues when building the system
I did run into a few issues when building the system, the first I ran into was permission issues when trying to use the built tools.
Tools permission issues
This seemed to be occurring as I hadn’t changed the owner of the tools and sources directory.
To solve this, I signed out of the terminal logged in as the lfs user, and ran the following as root:
chown -v lfs $LFS/tools
chown -v lfs $LFS/sources
Autoconf test failures
When installing and testing autoconf - on the first attempt when running make check,
there were 56 test failures.
To solve this, I first exited the autoconf directory, removed the extracted directory,
then re-extracted again.
Before running configure again, I ran the following:
sed -e 's/SECONDS|/&SHLVL|/' \
    -e '/BASH_ARGV=/a\ /^SHLVL=/ d' \
    -i.orig tests/local.at
After this, all of the tests passed as expected. This may be fixed in autoconf 2.72 or later, but this appears to be caused by using bash 5.2 or later, as mentioned in the systemd guide 3.
Configuring the linux kernel
When configuring the Linux kernel, there are a few options that you need to check are enabled, such as ensuring a relocatable kernel image is built.
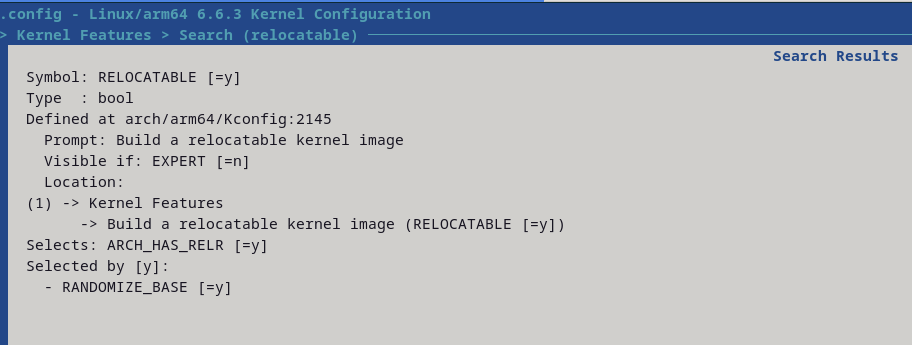
This RELOCATABLE option seemed to only be visible when the expert mode was enabled.
After building an LFS system a couple of times now, the easiest way I’ve found to this is to use make defconfig to create a default conifg, then open the .config file in VIM or a different text editor if you installed it on the LFS system. This will then let you update the settings quicker as you can search for them. The settings will be the same as the name mentioned in the guide, but will be prepended by CONFIG_.
Configuring grub config and initial boot
When configuring the grub config file (that is placed in /boot/grub/grub.cfg), there are
two very important lines that you will need to make note of.
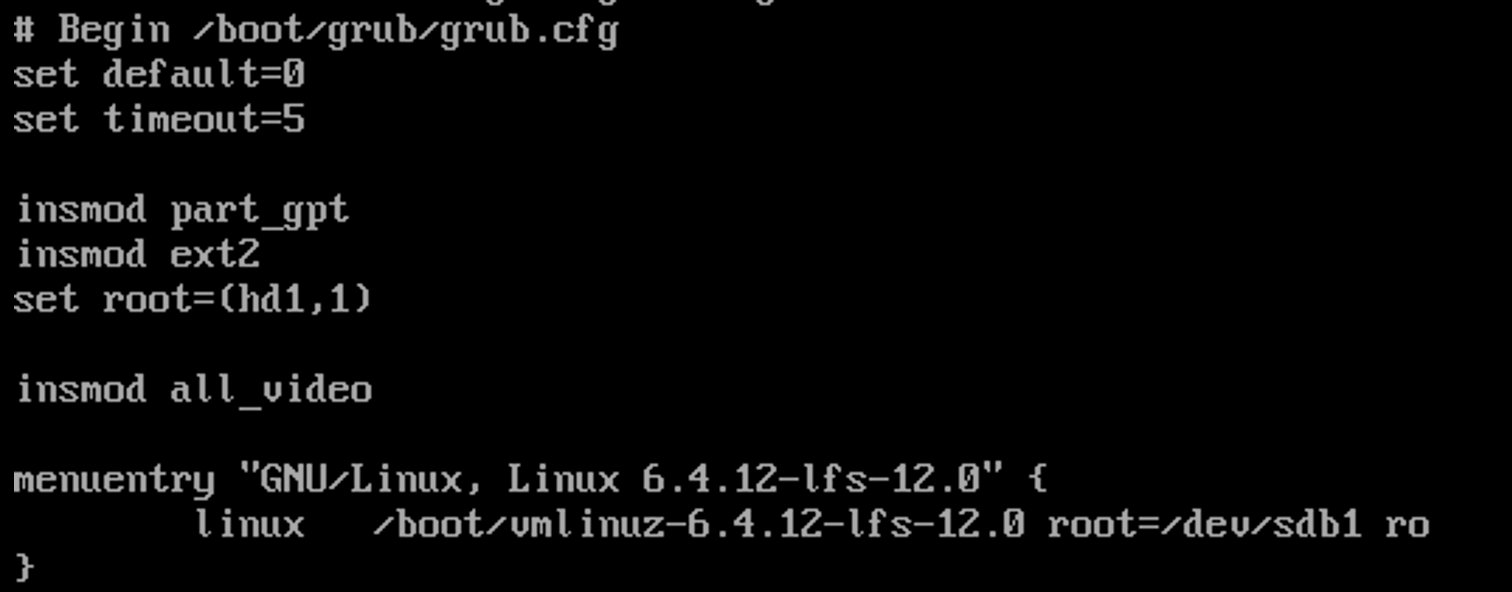
The first is the set root line. This will need to be set to the drive and partition that you have
installed your lfs system on.
The second is the line that starts with linux /boot/vmlinuz..... The last section of this
line will also need to point to the drive / partition your lfs system has been built in.
Rebooting into the system in parallels
The easiest way I’ve found to boot into the system is to select the boot device on start up in the VMs’ settings.
This will need to be updated to match the below:
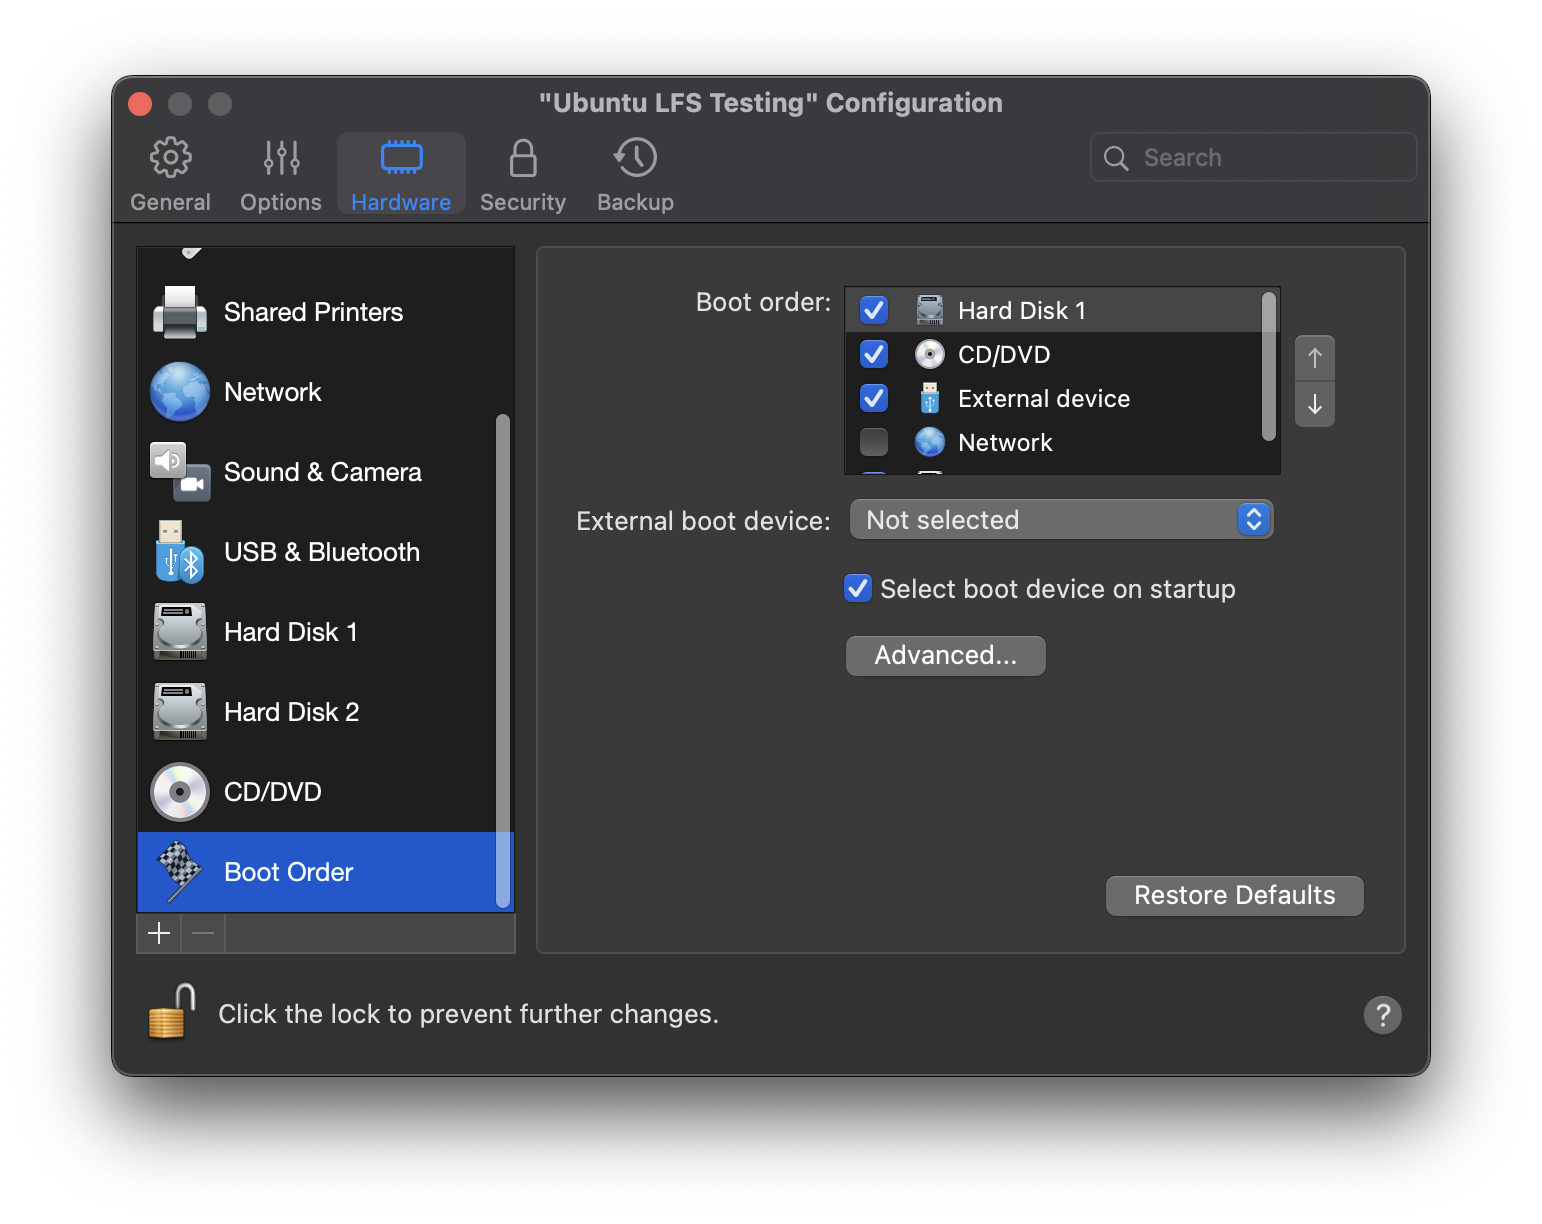
When you boot the VM, you can then select Boot Manager and boot the drive where you created the lfs system.

Debugging boot errors
When booting the system for the first time, I ran into the following error:
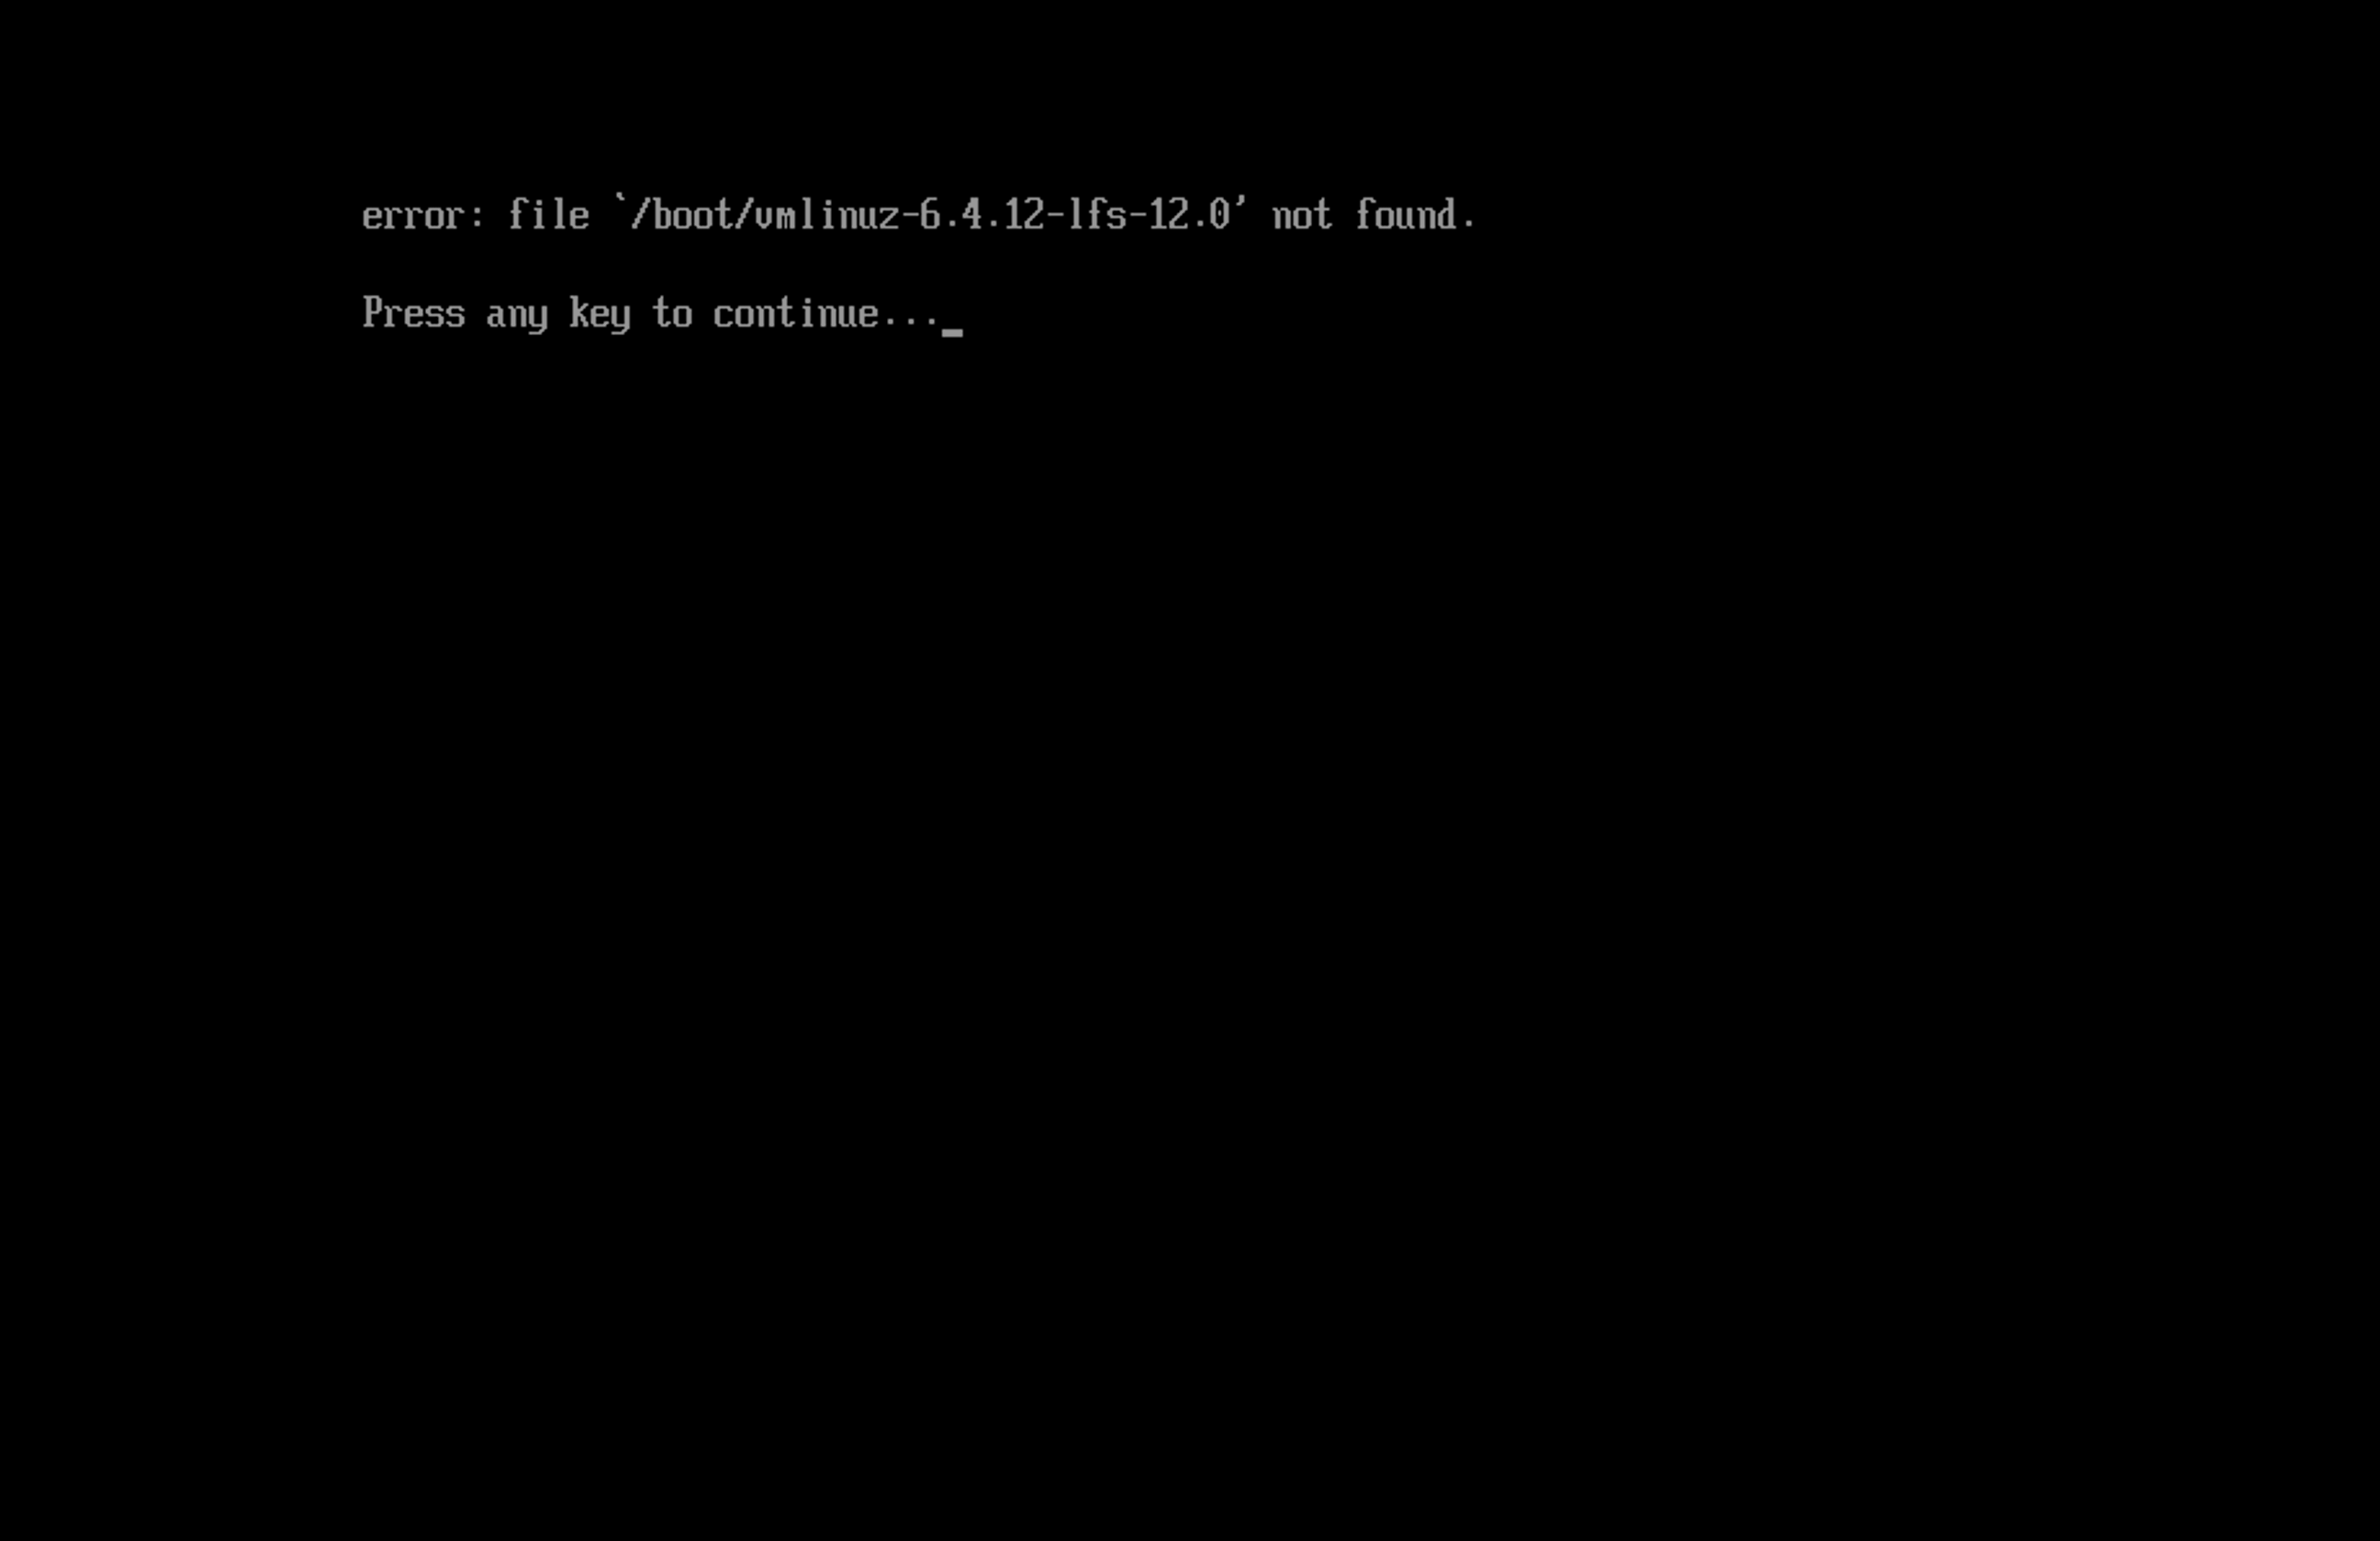
This is conveniently one of the first few errors in the troubleshooting guide 4, and the fix in the first section worked.
This involved using the ls command, e.g. ls (hdd1,0) to identify the boot drive that
we need to set in the grub config. There could potentially be multiple entries for the same drive, with these being the
different partitions that exist on that drive.
With the correct drive / partition identified, you’ll need to re-run the commands from the grub config file, such as
set root=({drive,partition}).
The Linux command will also need to be set, this can be done by running the following, where boot/umlinuz-6.4.12-lfs-12.0 is the path to the image built previous, and /dev/sdb1 is linux /boot/umlinuz-6.4.12-lfs-12.0 root=/dev/sdb1 ro.
With these set, you can then run the boot command to see if these fix the issue. If they do - remember to update the grub.cfg file mentioned earlier.
After the running the boot command, the system booted up successfully. We can also use a few of the programs we installed
previously such as python.
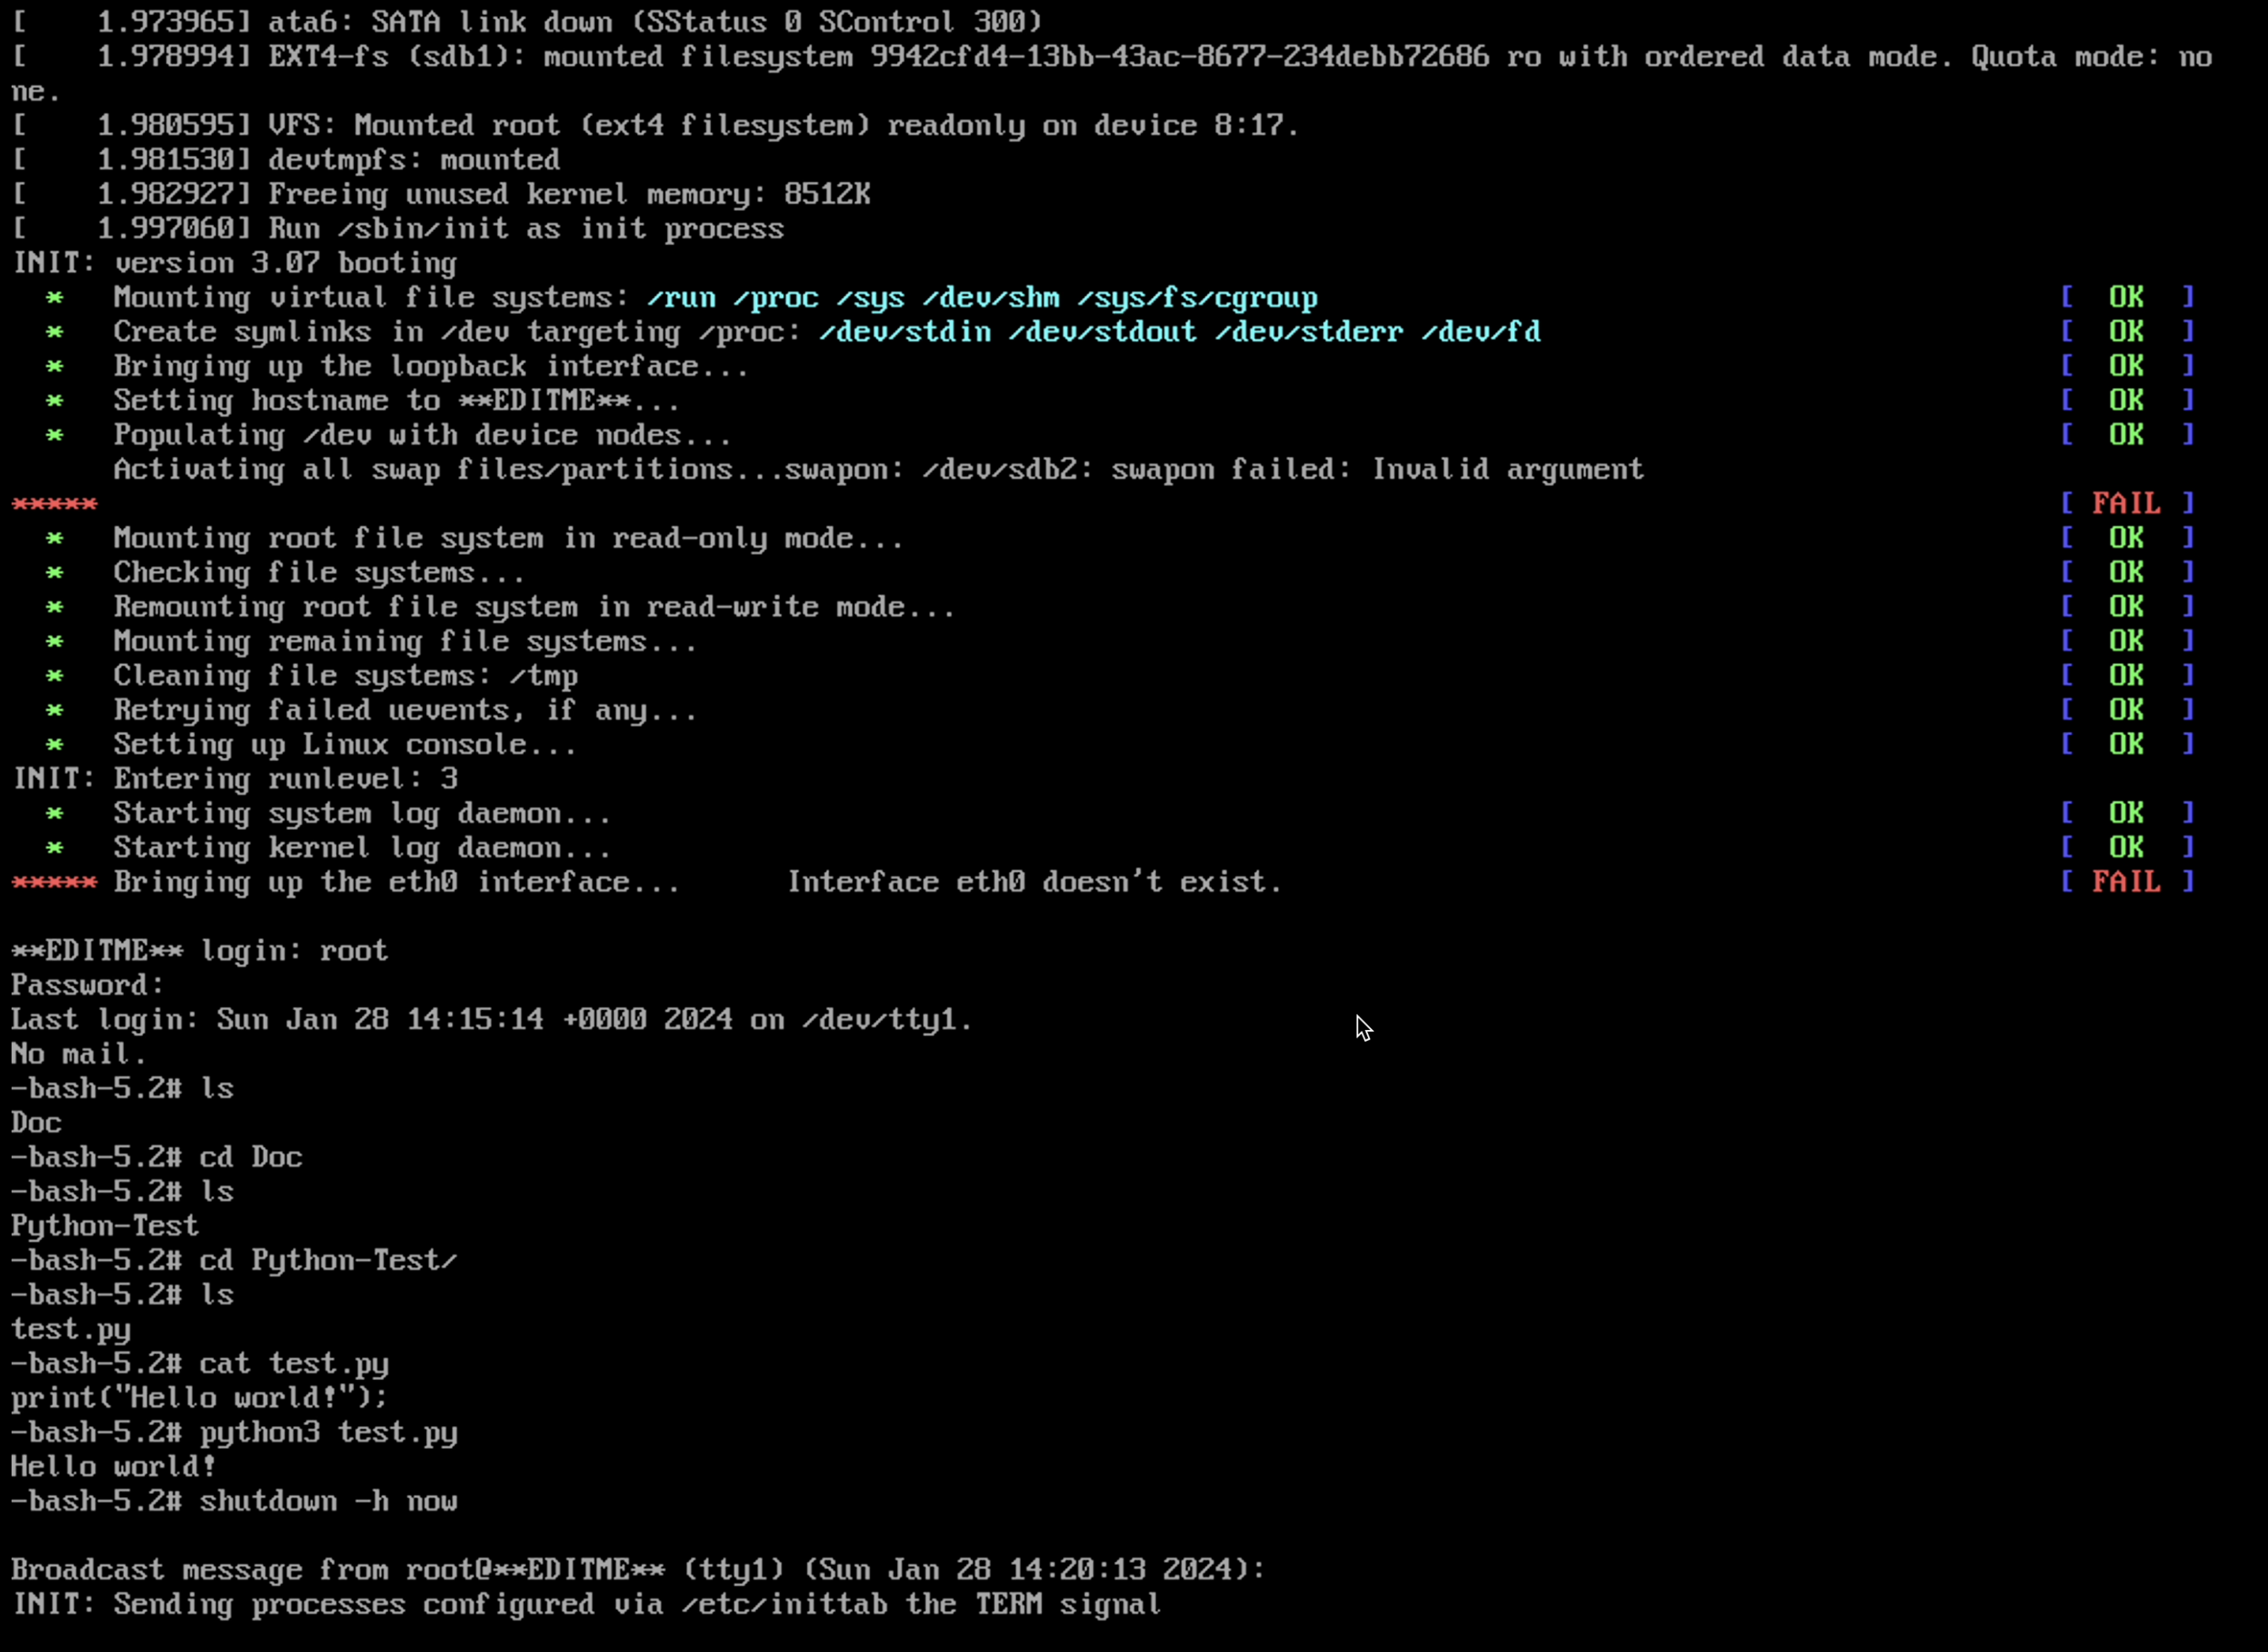
As you can probably tell from the screenshot, there are a few things that still need to be updated ![]() . The easiest / quickest to update will be where it says
. The easiest / quickest to update will be where it says **UPDATEME** before signing in as root. We can update this by editing the value in the /etc/hostname file.
Summary
As the system now boots successfully I think I’ll leave this here. The next thing to look at will be getting the system to connect to the internet so it’s easier to install new programs. After that - I may look into trying to add a UI to the system which will take a while.
References
[1] Linux from scratch cross compilation
[2] System Requirements version check script
[3] LFS systemd autoconf installation
[4] LFS Troubleshooting guide